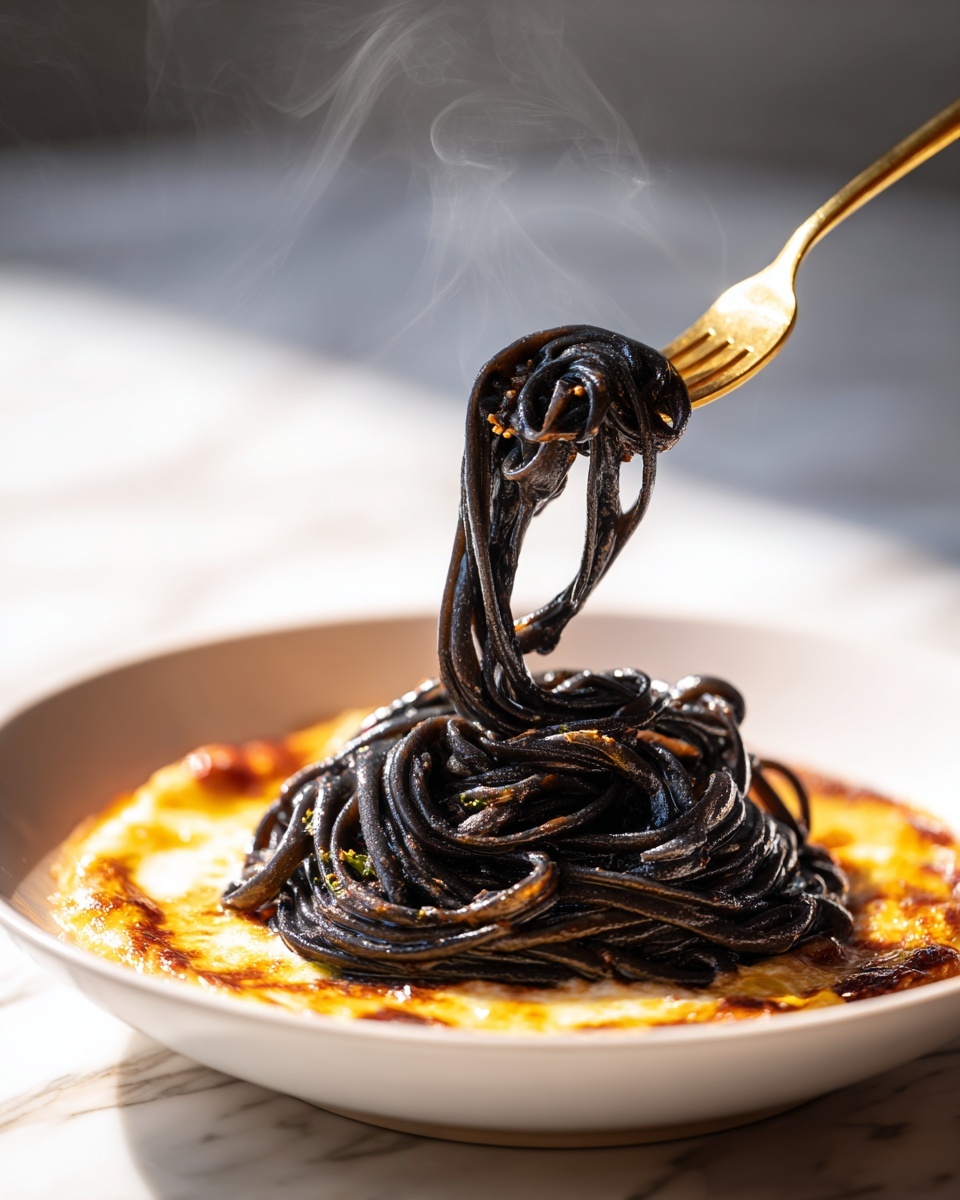
If you have a passion for bold flavors and striking dishes, the Witches Hair Pasta (Squid Ink Pasta) Recipe is a must-try! This mesmerizing black pasta isn’t just a visual stunner; it delivers a rich, garlicky, and slightly spicy experience that’s utterly unforgettable. With a simple yet elegant sauce that embraces the deep oceanic essence of squid ink, this recipe elevates your pasta nights to something truly magical.
Ingredients You’ll Need
Getting started with the Witches Hair Pasta (Squid Ink Pasta) Recipe is refreshingly straightforward. Each ingredient plays a crucial role in building those rich layers of flavor and texture while complementing the stunning color of the pasta.
- 6 large garlic cloves, finely chopped: Garlic provides a fragrant, savory base that infuses the dish with warmth and depth.
- 1 tablespoon salt: Essential for seasoning the pasta water and enhancing the pasta’s natural flavor.
- 1 lb dried squid ink spaghetti: The star of the show, this dark pasta gives the dish its signature color and subtle briny taste.
- ⅓ cup olive oil: Adds richness and helps gently cook the garlic without overwhelming it.
- 1 teaspoon crushed red pepper flakes: Brings a lively kick of heat to balance the deep umami notes.
- ½ cup reserved pasta cooking water (plus an additional cup if needed): The starchiness from the pasta water helps create a smooth, cohesive sauce.
How to Make Witches Hair Pasta (Squid Ink Pasta) Recipe
Step 1: Prepare the Pasta
Start by bringing a large pot of water to a rolling boil, then add the salt. The salt not only seasons the pasta but also enhances the squid ink’s unique flavor. Cook the dried squid ink spaghetti according to the package instructions until just al dente. You’ll want it tender with a slight bite to hold up perfectly in the sauce.
Step 2: Make the Garlic Oil Sauce
While the pasta cooks, heat the olive oil in a large pan on low heat. Add the finely chopped garlic and allow it to cook slowly for about 4 minutes. Stir it frequently to ensure it becomes tender and fragrant without browning or burning—this slow cooking is the secret to that rich, mellow garlic flavor.
Step 3: Add a Spicy Touch
Next, stir in the crushed red pepper flakes, cooking them for about 30 seconds. This step releases their aroma and adds that subtle heat that pairs beautifully with the squid ink pasta’s briny depth.
Step 4: Create the Sauce Base
Before you drain the pasta, scoop out ½ cup of the starchy pasta cooking water. Add it carefully to your garlic and oil mixture and let it simmer gently. This starchy water loosens the garlic oil, turning it into a silky sauce that will cling beautifully to every strand of your witches hair pasta.
Step 5: Combine Pasta and Sauce
Drain the pasta, but keep an additional cup of the cooking water just in case. Toss the pasta immediately into the pan with the garlic oil sauce, mixing well to ensure every strand is coated. If needed, slowly add more pasta water to achieve that perfect glossy, luscious finish.
Step 6: Serve It Fresh
Witches Hair Pasta (Squid Ink Pasta) shines brightest served right away while the sauce is fresh and vibrant. The contrast of the deep black noodles with the golden garlic sauce is truly hypnotizing.
How to Serve Witches Hair Pasta (Squid Ink Pasta) Recipe
Garnishes
Simple garnishes make all the difference. Sprinkle chopped fresh parsley for a pop of green and freshness. A squeeze of lemon juice or a light dusting of grated Parmesan can add brightness and richness, but be careful not to overpower the delicate squid ink flavor.
Side Dishes
This bold pasta pairs wonderfully with light, crisp side salads—think arugula with lemon vinaigrette or a simple mixed greens salad. If you want something heartier, a crusty rustic bread for dipping into the garlicky sauce complements the meal perfectly.
Creative Ways to Present
For an elevated presentation, twirl individual portions into nests on the plate and drizzle with a little extra virgin olive oil. Adding a few seared scallops or shrimp on top can turn this dish into a sophisticated dinner party centerpiece that’s both stunning and delicious.
Make Ahead and Storage
Storing Leftovers
You can store any leftovers from your Witches Hair Pasta (Squid Ink Pasta) Recipe in an airtight container in the refrigerator for up to two days. Since squid ink pasta is delicate, it’s best eaten fresh, but quick storage allows you to enjoy it a second time.
Freezing
Freezing is generally not recommended for squid ink pasta with this kind of sauce because the texture of both the pasta and the garlic oil sauce can suffer. If you must, freeze the pasta and sauce separately in airtight containers for up to one month.
Reheating
Reheat leftovers gently in a skillet over low heat. Add a little olive oil or reserved pasta water to loosen the sauce and prevent the pasta from drying out. Avoid microwaving, which can toughen the pasta and diminish flavors.
FAQs
What is the best way to cook squid ink pasta?
Cook squid ink pasta like any other dried pasta—boil salted water and follow the package directions until al dente. Cooking it properly ensures the best texture to absorb the sauce and maintain its signature dark color.
Can I use fresh squid ink pasta instead of dried?
Absolutely! Fresh squid ink pasta cooks faster, usually just a couple of minutes, so keep a close eye on it to prevent overcooking. The flavor is just as vibrant and the texture delightfully tender.
Does squid ink pasta taste fishy?
Squid ink pasta has a subtle briny, ocean-like flavor, but it is not overwhelmingly fishy. Its unique taste beautifully complements garlic and chili, enhancing the overall savoriness without overpowering the senses.
Where can I buy squid ink pasta?
Squid ink pasta is available at specialty grocery stores, Italian markets, and online food retailers. Look for reputable brands to ensure quality and authentic flavor.
Can I add other ingredients to this recipe?
Definitely! This Witches Hair Pasta (Squid Ink Pasta) Recipe provides a perfect base. You can add seafood like shrimp or calamari, olives for extra brininess, or fresh herbs for additional aroma. Just keep balance in mind to let the squid ink shine.
Final Thoughts
This Witches Hair Pasta (Squid Ink Pasta) Recipe is truly a dazzling dish that combines stunning visuals with unforgettable flavors. Whether you’re cooking for friends or treating yourself, it’s an exciting way to bring a bit of magic to your dinner table. Dive in and enjoy the deep, garlicky notes mingling with the mysterious charm of squid ink—you won’t regret it!
Print
Witches Hair Pasta (Squid Ink Pasta) Recipe
- Prep Time: 5 minutes
- Cook Time: 20 minutes
- Total Time: 25 minutes
- Yield: 4 servings
- Category: Main Course
- Method: Stovetop
- Cuisine: Italian
Description
Witches Hair Pasta, also known as Squid Ink Pasta, is a visually stunning and flavorful Italian dish featuring black squid ink spaghetti tossed in a fragrant garlic oil sauce with just a hint of spicy red pepper flakes. This easy-to-make recipe combines al dente squid ink pasta with a silky, aromatic sauce enhanced by reserved pasta water for perfect coating and texture. Ideal for a quick yet impressive dinner, this dish delivers a beautiful presentation and a subtle depth of flavor from the garlic and olive oil.
Ingredients
For the Pasta
- 1 lb dried squid ink spaghetti
- 1 tablespoon salt
For the Sauce
- ⅓ cup olive oil
- 6 large garlic cloves, finely chopped
- 1 teaspoon crushed red pepper flakes
- ½ cup reserved pasta cooking water (plus an additional cup reserved)
Instructions
- Prepare the Pasta: Bring a large pot of water to a boil and add the salt. Cook the squid ink spaghetti according to the package instructions until it reaches an al dente texture, ensuring the pasta retains a slight firmness.
- Prepare the Garlic Oil Sauce: While the pasta cooks, heat the olive oil in a large pan over low heat to gently infuse the oil with the garlic flavor without burning it.
- Cook the Garlic: Add the finely chopped garlic to the warm oil and cook it gently for about 4 minutes. Stir frequently to prevent the garlic from browning or burning, which could result in a bitter taste.
- Add Red Pepper Flakes: Stir in the crushed red pepper flakes and cook the mixture for an additional 30 seconds to release the flavors and heat into the oil.
- Create the Sauce Base: Before draining the pasta, carefully remove ½ cup of the starchy pasta cooking water and add it to the garlic oil mixture in the pan. Let the sauce simmer gently to combine and emulsify the flavors while the pasta finishes cooking.
- Combine Pasta with Sauce: Drain the spaghetti, reserving an additional cup of pasta water. Add the drained pasta to the garlic oil sauce and toss thoroughly to coat each strand evenly with the sauce.
- Adjust Sauce Consistency: If the sauce appears too dry or clings unevenly, add the reserved pasta water gradually until the sauce smoothly coats the pasta to your desired consistency.
- Serve Immediately: Plate the pasta right away to enjoy its optimal flavor and visual appeal, serving the dish while hot for the best experience.
Notes
- Be cautious not to burn the garlic during cooking as it will impart bitterness.
- Squid ink pasta has a slightly briny flavor that pairs well with simple garlic-based sauces.
- Reserved pasta water is key to achieving the perfect silky texture in the sauce.
- Adjust the amount of crushed red pepper flakes to control the spiciness.
- This dish is best served fresh and warm to showcase its unique color and flavor profile.


